 This plugin allows you to set background images or background videos to a whole page or sections of any page.
Installation
- From the left sidebar of WordPress admin panel, go to Plugins > Add New.
- Once in the “Add Plugins” window, type “wpxp background media” in the search box at the top right.
- Install the “WPXP Background Media” plugin by clicking the “Install Now” button.
- Then click the “Activate” button to start using this plugin
Aternatively, you can head over to the WordPress.org website to download the WPXP Background Media plugin and then upload it to your website.
Settings
- From the left sidebar navigation of your WordPress control panel, look for the menu item labeled “WPXP BG Media” then click on it.
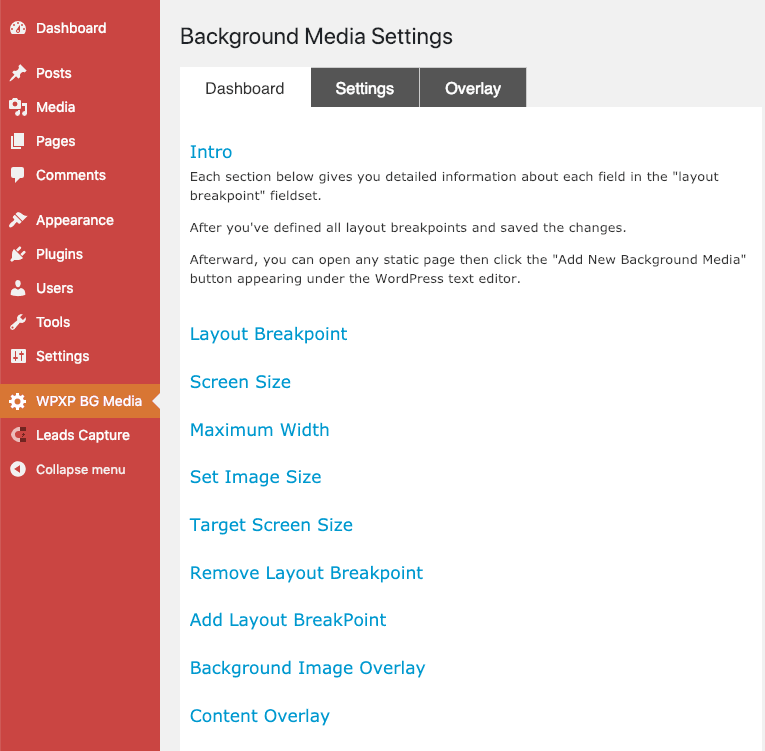
- The information under the “Dashboard” tab gives you enough details on how to define the settings in the “Settings” and “Overlay” tabs.
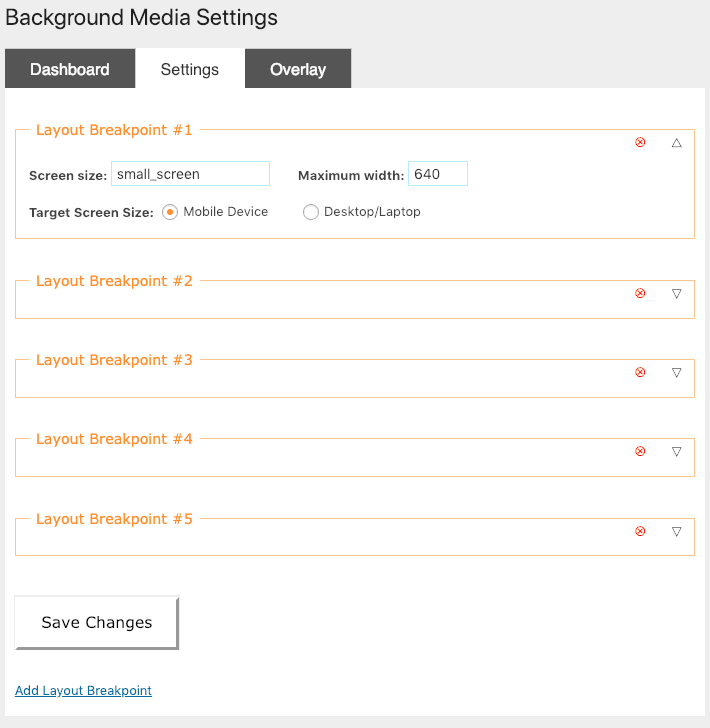
- From the Settings Tab, define your active theme’s layout breakpoints
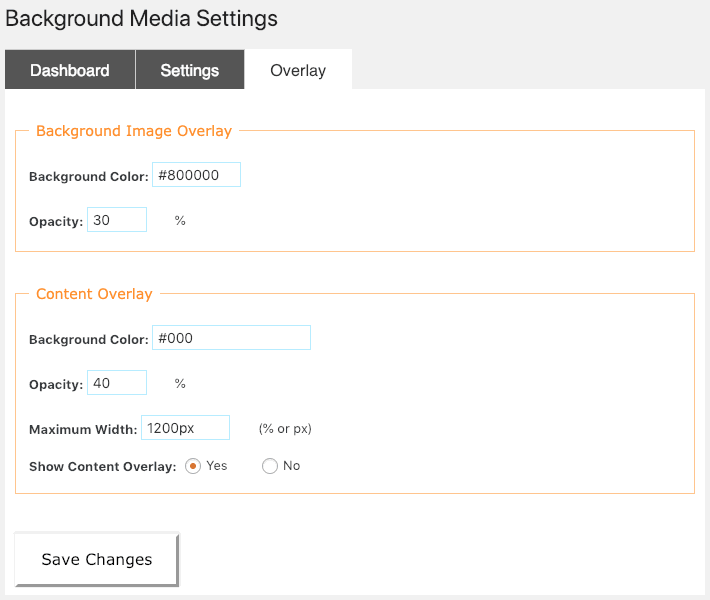
- Finally, in the “Overlay” tab, define the background color and opacity of the “Background Media Overlay” and the “Content Overlay”
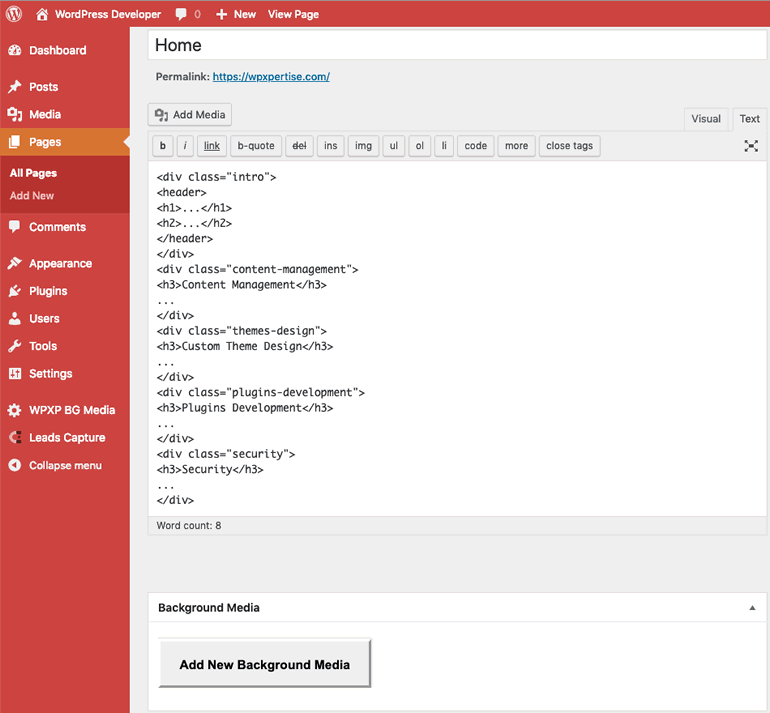
Page Editor Metabox
When you open any static page for editing, you’ll see a button labeled
“Add New Background Media”.
Click to define the background image or video for the current page or just a section of that page.
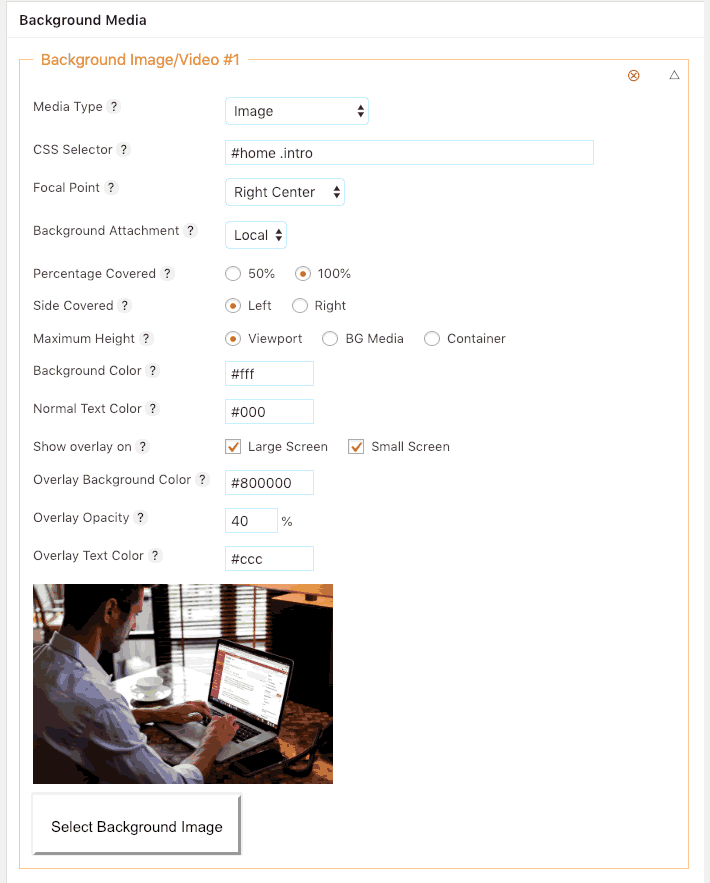
Each label displays the “?” icon. Hover on that icon to reveal a tooltip that will give you a description of the corresponding field.
The “Select Background” button opens your WordPress media library to let you choose the image you would like to set as the background of the container matching the specified “CSS selector”.
You can set as many background images or videos as you want on the current page. Simply click the “Add New Background Media”.
Once you are done setting the background media items, click the “Update” or “Save Draft” button inside the “Publish” box at the right-hand side of the page editor.
Let’s say, for instance, you’ve defined a section with a class name “intro” (<section class=”intro”>…</section>) in the content of your page named “About Us”. That page slug will, therefore, be by default “about-us”.
You can hence, set the “CSS selector” field’s value to “#about-us .intro”.
That way, the background image you’ve selected will only apply to the intro select of this specific page.
Background Image
Media Type
You can choose either to use an image or a video as a background for the HTML element matching the “CSS Selector”
CSS Selector
That’s the HTML element the background image or video will be applied to.
Focal point
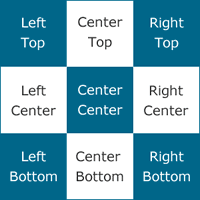 It’s the main center of interest of the image, the spot that captures visitors’ attention the most. It’s the reference point when the background image is resize to fit the user’s screen size.
There are nine CSS options matching each rectangle shown above. Divide the background image into 3 columns of equal widths and 3 rows of the same height. The horizontal position is designated first then its vertical position.
Percentage Covered
You can set the background image to cover only half of the width of its target container. In which case you’d choose the option 50% for the “Percentage covered”. When that option is chosen, the content (copy) in that container will occupy the remaining half of the container width. There won’t be an overlay on that background image.
However, on mobile devices, the background image will always cover the entire with of its target “CSS selector” container. The overlay is then applied to the background image and possibly second overlay named “content overlay” which serves to darken the overlay and allows contrast with the content displayed above the background image.
Side Covered
If you choose to cover only 50% of the target container, then you must specify which half will be covered by the background image. The content of that “CSS Selector” will then display on the other half of its container.
Background Color
It’s the hexadecimal value (e.g. #fff) of the background color of the target “CSS selector” container. That value is particularly important when only half of the container is covered by the background image. In that case, the background color peeks through the other half of the surface covered by the content of that container.
Normal Text Color
It’s the color of the text not displayed over the background image. Therefore you should specify a color that offers enough contrast against the “Background color” chosen above.
Show Overlay On
It determines whether you want the overlay to appear over the background image on large screens (desktops/laptops), smaller screens (tablets/smartphones) or on both.
However, the screen widths qualified as large or small are determined by the maximum width of layout breakpoints set to target mobile devices or desktops and laptops.
That’s the “Target Screen Size” option in the Settings tab of the “WPXP BG Media” section of your WordPress control panel’s left sidebar navigation.Overlay Background Color
It’s the hexadecimal value of the overlay of the background image. It gives that image a tint to match the active theme’s color palette. To dampen the effect of that tint, another overlay named “content overlay” would be added.
Overlay Opacity
That determines how opaque the overlay over the background image is.
Overlay text color
is the hexadecimal value (e.g. #fff) of the color of the text when it appears above the overlay.
Select Background Image
When clicked, it opens your WordPress media library where you’d choose a background image.
A thumbnail of the image selected will display above this button afterward as a visual aid. The full-size image will be used instead at the front-end of the website.If the background image is to cover the entire width of the screen then make sure the original image uploaded to your media library is wide enough to match widescreens without too much pixelation.
Even if the original image is about 3000px wide, a good image compression before uploading it to your media library ensures your web page loads fast on large screens.
This plugin makes copies of that original image each matching the maximum width –layout breakpoint– defined in the “Settings” tab:
WPXP BG Media > SettingsTo prevent unnecessary use of your web hosting disk space needed copies will be created only once that image is chosen to serve as background.
Background Video
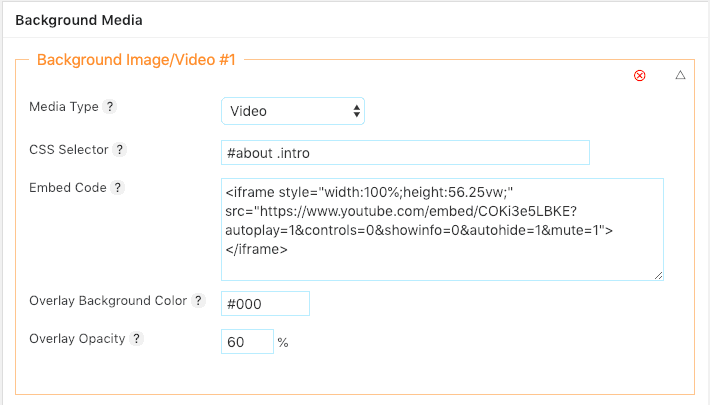
To use a background video instead:
- Choose the option “video” from the “Media Type” selection list
- Then you would just define the “CSS Selector” the background video applies to
- Paste the embed code of the background video in the larger text box reserved for that purpose.
- Set the “Overlay Background Color”
- Set the opacity of the overlay
Active Theme Tweaks
The page’s slug is used by default as the CSS selector the background image/video will be applied to. You can edit that field to according the structure of the HTML in that page. However, it’s always a good practice to qualify the CSS selector in a given page by preceding it with that page ID (not the database ID). That ID will more likely match the page slug.
If your active theme does not use the page slug to qualify each static page then you should go ahead and modify that theme to set that ID either on the opening “body” tag or the wrapper element:
a) Open the “header.php” file and locate
<?php wp_head(); ?>
then edit it to get the following:
<?php
wp_head();
if(is_front_page()){ $post_slug=’home’; }
else if(is_page()){ $post_slug=$post->post_name; }
else if(is_singular(‘wpxp_resources’)){$post_slug=’resources’; }
else if(is_singular(‘wpxp_leadgen’)){$post_slug=’leadgen’; }
else { $post_slug= ‘blog’; }
?>
If you’re not custom post types (e.g. wpxp_resources, wpxp_leadgen), you can simply remove the first two “else if” conditions above.
b) Look for the first “div” tag that appears after the opening “body” tag. If it uses a class name such as <div class=”wrapper”>. It also wraps all the HTML inside the “body” tag. It’s the right spot to define the page ID. You can simply add an ID attribute to it such as:
<div class=”wrapper” id=”<?php echo $post_slug; ?>”>
Notice the PHP variable “$post_slug” is previously defined above as shown in section a)
c) You can now save the “header.php” file then upload it to your website.
Go ahead and nstall then activate the WPXP Background Media plugin on your website. Follow the steps displayed above to unleash the power of this plugin.
Leave a review to help us improve this plugin. We appreciate your feedback.